Give Your Home A Makeover With LED Strip Light Installation
LED lighting installation can completely transform the look and feel of any room. With the right lighting, you can create a warm, inviting ambience or make a bold, modern statement. LED strip lights are a versatile and easy way to add dramatic or subtle lighting effects to your home. This comprehensive guide will walk you through everything you need to know for a successful LED strip light installation.
Why LED Strip Lights Are Worth Investing In
LED strip lights have many advantages over traditional lighting fixtures that make them worth the investment. Here are some of the top reasons to consider installing these energy-efficient lights:
Endless design possibilities – One of the best aspects of LED strips is the flexibility they allow in lighting design. The lights come in all colors of the rainbow, can be cut to size to fit any space, and bent around corners and edges. You can get really creative with lighting effects using LED strips.
Energy efficient – LED strips consume far less electricity than incandescent and halogen bulbs. This saves a significant amount on energy bills over time. And it’s better for the environment.
Have A Project In Mind?
Let's Text About Your ProjectLong lifespan – An quality LED strip light can last up to 50,000 hours of use before needing to be replaced. That’s decades of illumination without the hassle or cost of changing bulbs.
Cool to the touch – Unlike hot halogen lights, LEDs don’t generate much heat. The strip lights stay cool to the touch, reducing risk of accidental burns or fires.
Easy installation – LED strip lights typically have a self-adhesive backing that makes installation a breeze. No need to call an expensive electrician for basic installation.
Dimmable – Many LED strip light kits come with convenient dimmer remotes that allow you to easily control the brightness. Great for setting mood lighting.
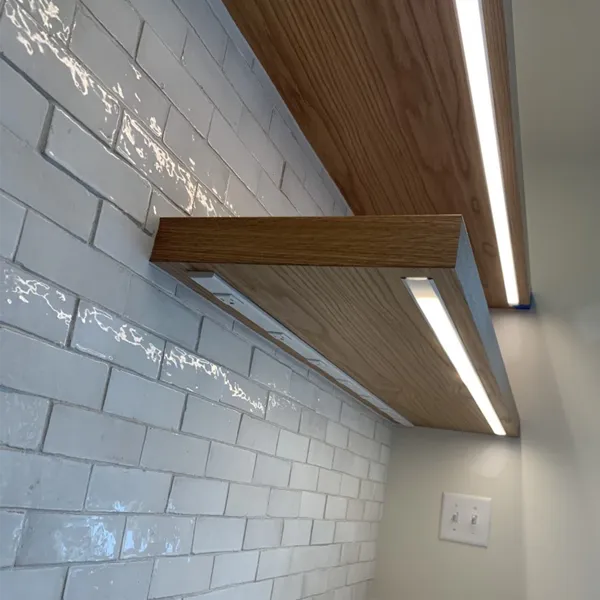
Accent and task lighting – Use LED strips for under-cabinet kitchen lighting, bed headboards, staircases, and anywhere you want accent or task lighting.
Questions About Our Services?
Let's Connect And Discuss
With benefits like these, it’s easy to see why LED strip lights are becoming more and more popular for home lighting projects. The lights can be used in creative ways to give any room a makeover.
Choosing the Right LED Strip Lights

Planning Your LED Strip Light Installation
The key to a successful LED strip light installation is proper planning and preparation. Follow these important steps before starting:
Choose the correct lights – Select LED strip lights that fit your lighting needs – color, brightness, length, etc.
Select accessories – Make sure to get a compatible dimmer, power supply, extension cords, and any connectors or mounting clips needed.
Decide placement – Determine the exact positioning of the lights under cabinets, behind furniture, etc. This affects how you’ll install them.
Check the surface – Ensure the installation surface is smooth, clean, and completely dry. LED tape won’t adhere properly to dirty or uneven spots.
Have all materials ready – Before starting, gather all the lighting materials in one place – the LED strips, power supply, connectors/cables, double-sided tape, tools, etc.
Review wiring – Read the manufacturer instructions so you understand how to properly wire and connect the LED strip lights before cutting or installing anything.
Outlet access – Check that you have enough nearby outlet access or plan for extension cords and power connections.
Thorough planning and preparation will help your LED strip light installation go quickly, efficiently, and safely.
Step-By-Step: Installing LED Strip Lights Under Cabinets
The kitchen is one of the most popular and useful places to install LED strip lighting. Follow this straightforward, step-by-step process for beautiful under-cabinet lighting:
Get In Touch!
Text Us For A QuotePrep the Area
- Thoroughly clean the underside of the cabinets where you’ll affix the LED strips. Remove all grease, dust and debris so the surface is completely clean.
- For best results, do a final wipe of the area with isopropyl alcohol to remove any residue.
- Measure the total length needed and cut LED strip lights to fit perfectly along the entire underside of the cabinets. Leave a little extra strip at the ends.
Mount the LED Strips
- Peel off the adhesive backing tape a few inches at a time, carefully pressing the LED strip to firmly adhere it to the cabinet bottom.
- Continue slowly removing the backing and sticking the strip light along the underside, smoothing as you go to avoid bubbles.
- At corners or for extra long cabinets, use connector clips to join additional LED strip sections. Connect wires properly.
Power the LED Light Installation
- Run the LED strip light power cord neatly along trim to reach the nearest outlet. Use cable clips to keep cord attached.
- Connect the LED power supply and use the included remote to test the lights and adjust brightness as desired.
Enjoy Your New Under-Cabinet Lighting!
Your kitchen now has beautiful, energy-efficient lighting right where you need it most!
Illuminate Your Bedroom With Mood Lighting Using LED Strips
Want to give your bedroom a dreamy glow? Follow these steps to install LED strip lights behind headboards, bed frames, or along the baseboards to create a relaxing ambience:
Prepare the Mounting Area
- Measure the specific areas where you want to install the LED strip lighting. Cut LED strips to the proper length as needed.
- Thoroughly clean and dry all chosen mounting surfaces. Use isopropyl alcohol if needed to remove residue.
- Have power extension cords or outlet adapters ready if needed to power the LED lights.
Mount the LED Strips
- One section at a time, carefully peel off the adhesive backing and firmly press the LED strip to adhere it straight to the surface.
- On corners or edges, use the 90-degree connector wires to bend the strip lights around neatly.
- For headboards, affix the LED power supply to the back or bottom within reach of the strip light cords.
Activate and Adjust the Lighting
- Connect the LED strips to the power supply and test them out before finalizing the installation. Make sure all lights are operational.
- Use the included LED dimmer remote to create the perfect romantic or moody brightness.
- Consider adding a timer or syncing the lights to music to create fun ambient lighting effects. Get creative!
With the right LED strip lights, you can easily transform your bedroom into a calming oasis.

Use LED Strip Lights to Add Accent Lighting to Living Rooms
LED strip lights can add a pop of color, visual interest, or accent lighting to living rooms:
Determine Placement
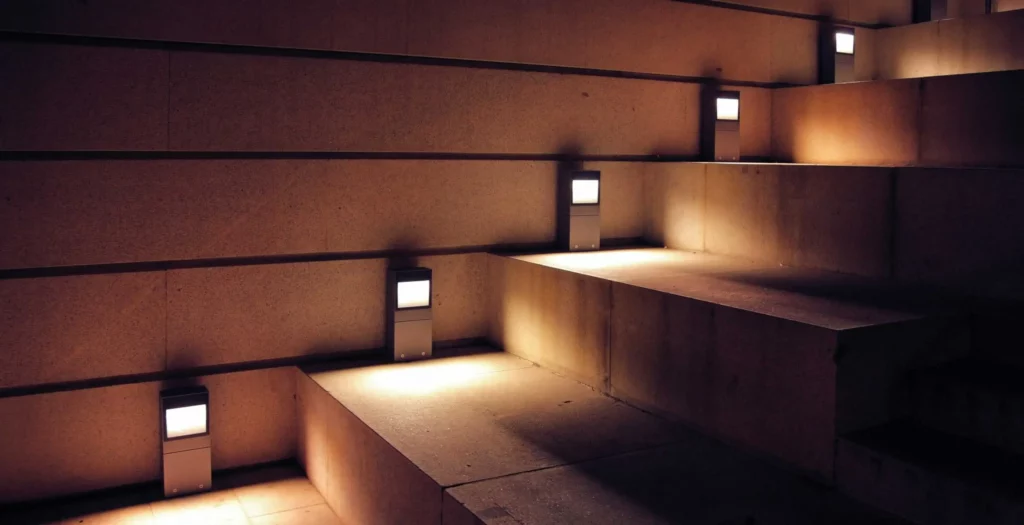
- Decide where you want to add LED strips – behind TVs, under shelves, along baseboards, stair risers, etc. Measure the areas.
- For clean-looking built-in lighting, consider installing LED strips behind crown molding or inside cove ceilings.
Cut and Install LED Strips
- Measure each accent area and cut LED strips to fit perfectly. Have some extra strip at the ends for adjustments.
- Thoroughly clean/dry the mounting surfaces, then slowly peel backing tape and stick lights. Press firmly to avoid bubbles.
- Use small LED strips to highlight shadow boxes, wall art edges, stair risers, and other design features.
Hide Wires and Power Lights
- Hide wires and connectors behind furniture, trims and frames for a streamlined look. Use cable clips.
- Connect the LED power supply in an outlet near the strips. Test lights and adjust brightness with the remote.
With strategic LED strip lights, you can easily add eye-catching accent lighting to make any living room more lively and stylish. Get creative with your lighting plans!
Tips For A Seamless, Successful LED Strip Light Installation
Follow these pro tips when installing LED strip lighting anywhere in your home to ensure the best results:
Don’t rush the installation. Go slowly when affixing the adhesive-backed LED strips. This prevents bubbles.
Thoroughly clean and dry the chosen mounting surface according to the LED strip’s specific adhesive requirements. This ensures proper sticking.
Apply constant even pressure along the strip light as you adhere it. The entire strip should be securely fastened flat.
Avoid bending the LED strip lights at very sharp angles during installation. This can potentially damage the internal LED diodes, causing dark spots.
Questions About A Project?
Let's Connect!For turns, use the angled or 90-degree connector wires that come with LED strip kits. This avoids overbending the lights.
Check the product instructions for guidance on properly cutting the LED strip lights. Improper cutting points can stop the current flow.
Confirm the LED power supply has the right voltage and ample amps to support the length of lights you’re installing. This prevents issues.
Neatly run all wires and connectors behind furniture or fixtures to keep them subtly hidden. Use cable clips or wire channels as needed.
Careful attention to detail helps ensure your LED strip lighting installation looks clean, professional and integrated.
Choosing the Right Dimmer and Power Supply
To get the most functionality and enjoyment from your new LED strip lights, it’s important to choose the right dimmer and power supply:
The dimmer switch should be specifically compatible with LED strip lights, as traditional dimmers can damage LED diodes.
Look for dimmers with multiple brightness levels and lighting effects like “pulse” or “fade”. This adds drama.
For very long LED strip runs, choose a higher voltage power supply (12V or 24V). This prevents voltage drop dimming.
Make sure the power supply wattage can handle the total length of LED strip lights you’re running. Undersizing can cause blown fuses.
Consider a wireless dimmer so you can adjust brightness and lighting effects from anywhere without wires.
Buy from reputable brands like WAC Lighting or Lutron for quality, safety tested dimming products. Avoid no-name suppliers.
Investing in the right dimmer and power supply allows you to unleash the full design potential of your new LED strip lights.

Creative Uses for LED Strip Lights
Beyond the basics, LED strip lights can be used in many creative ways to enhance your home’s ambience:
Outline doorways, arches, and ceilings for dramatic accent lighting. Use RGB smart lights to change colors.
Install LED strips under bathroom vanities to create bright, shadow-free grooming light.
Adhere LED strips inside glass cabinet doors to brilliantly illuminate displayed items.
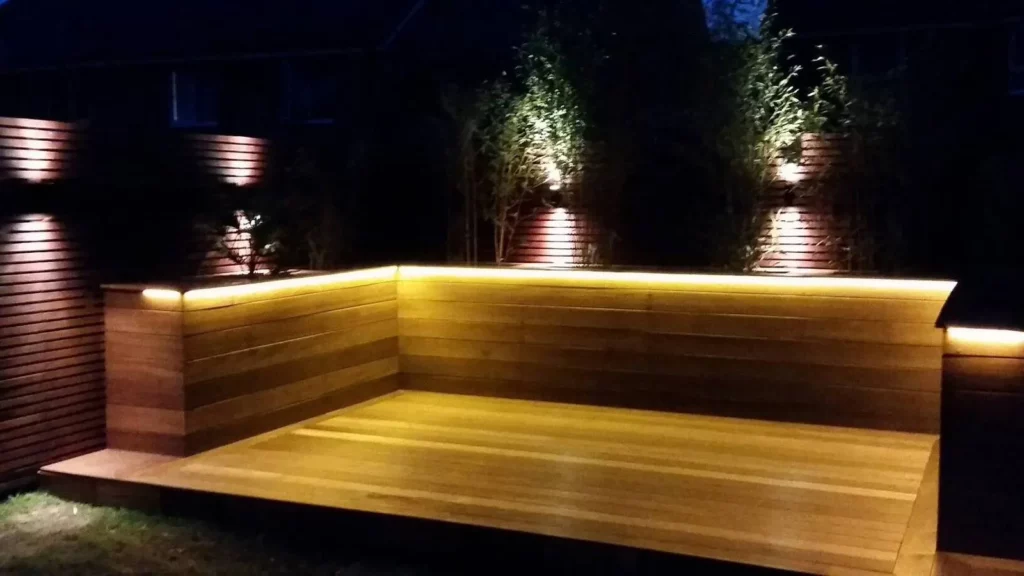
Outline outdoor paths and patios with weatherproof LEDs on timers for automatic night lights.
Attach strip lights to bed frames to add a fun pop of color that can even change with music.
Underlight outdoor plants and trees to transform your landscaping into dramatic scenery at night.
Accent the edges of floating shelves or picture ledges with LED strips to highlight decor.
With a little imagination, the possibilities are endless for how you can use LED strip lights creatively throughout your home – both indoors and outdoors.
Lighting Automation With LED Strips
To take your LED strip lighting to the next level, consider incorporating home automation technology:
Use smart RGB LED strip lights compatible with Amazon Alexa, Google Home or Apple HomeKit for voice control.
Connect LEDs to smart home systems like Philips Hue, Lutron Caséta or Samsung SmartThings for advanced lighting features.
Program scenes like “Movie Night” to dim the lights to the perfect brightness with one voice command.
Set schedules to have the lights turn on automatically in certain areas at set times for convenience.
Sync the LED strip colors and effects to music, videos or games for immersive ambient lighting.
Control lights remotely from your phone with manufacturer apps even when away from home.
Home automation allows you to get the most value from your LED strip lighting for unparalleled convenience and ambience.
Maintaining LED Strip Lights
To keep your LED strip lights looking their best:
Gently clean the plastic casing periodically using a microfiber cloth to remove dust and dirt buildup.
Check that the lights are securely adhered. Reattach any loose sections with adhesive strips.
Make sure end connectors and wires are not damaged or loose. Replace any defective parts.
Confirm the power supply is working properly and providing the correct voltage to avoid issues.
Check for any cuts, nicks or damage to strip coating that could allow moisture damage. Seal with adhesive or electrical tape.
With occasional inspection and cleaning, LED strip lights will provide many years of reliable illumination.
Light Up Your Life With LEDs
Installing LED strip lighting is an easy, cost-effective way to transform the ambience in any space. Use color-changing LEDs for fun mood lighting or sleek white lights for task illumination. With minimal effort, you can outfit your home with beautiful and energy-efficient LEDs. Just follow the manufacturer’s instructions, do thorough planning, and take your time installing the lights neatly. Soon you’ll be enjoying personalized lighting effects that make your home more stylish, comfortable and inviting. Get creative and let LED strip lights give your rooms an illuminated makeover!
FAQs
Q: What is a LED light strip?
A: A LED light strip is a flexible circuit board with surface-mounted light-emitting diodes (LEDs) that produce a bright and efficient light source. They are commonly used for various lighting solutions, including accent lighting, cove lighting, and cabinet lighting.
Q: How do I install LED strip lights?
A: To install LED strip lights, clean and dry the surface where you plan to mount the lights. Then, measure and cut the strips to fit the desired area. Finally, use strip light adhesive to attach the lights to the surface and connect them to a power source.
Q: Can LED light strips be connected together?
A: Yes, LED light strips can be connected together to create longer lengths of lighting. This can be done by using strip extensions or by connecting the strips together using connectors.
Q: What is the best way to connect LED light strips together?
A: The best way to connect LED light strips together is to use strip connectors or soldering the strips together. This will ensure a secure and reliable connection between the strips.
Q: How do I install LED strip lights for cove lighting?
A: To install LED strip lights for cove lighting, measure the length of the cove and cut the strips accordingly. Then, use strip light adhesive to attach the lights along the cove, ensuring they are evenly spaced for a uniform lighting effect.
Q: Can LED strip lights be used for backlighting?
A: Yes, LED strip lights are commonly used for backlighting purposes. They can be installed behind objects or surfaces to create a subtle and stylish lighting effect.
Q: What are the benefits of using LED strip lights?
A: LED strip lights are energy-efficient, easy to install, and offer various lighting controls. They are also versatile and can be used for different lighting solutions, making them a popular choice for DIY installations.
Q: How should I clean LED light strips?
A: To clean LED light strips, use a clean cloth to gently wipe the surface of the strips. Avoid using abrasive materials or harsh chemicals, as they may damage the LED technology.
Q: What are some common applications for LED strip lights?
A: LED strip lights are commonly used for accent lighting, cabinet lighting, cove lighting, and as backlighting for various objects and surfaces. They are also popular for DIY installations and creative lighting projects.
Q: What are some important tips for installing LED strip lights?
A: When installing LED strip lights, make sure to smooth the strip down by hand to ensure a secure adhesion to the surface. Additionally, ensure that the surface is clean and dry before installation, and choose the appropriate type of LED strip for the desired lighting effect.
